So I'm back on the blog! Yay!
Why school life is so hectic I'll never know. College applications, homework, extracurriculars - they all take up so much time. It's good, though, because they're all things I enjoy doing ^___^
So I went to Harvard from the 7th to the 9th, and boy was it beautiful. The campus was really pretty, to say the least, and the people there were extremely nice. Also, did you know that there's a Curious George Store at Harvard Square? It holds everything Curious George - it's really cool!
I looked through my blog post views today, and it seems like my violin-making post has the most hits by far. Perhaps I'll make another violin with more detailed steps? That might be cool. A project for the winter, possibly?
Time certainly flies when you're preoccupied doing college applications and running around organizing Science Bowl scrimmages. I'll try to upload more posts ^___^
Until next time!
Monday, November 12, 2012
Thursday, July 26, 2012
Nostalgia Dump 2
I have here quite a few pictures that I found in my photo folder.
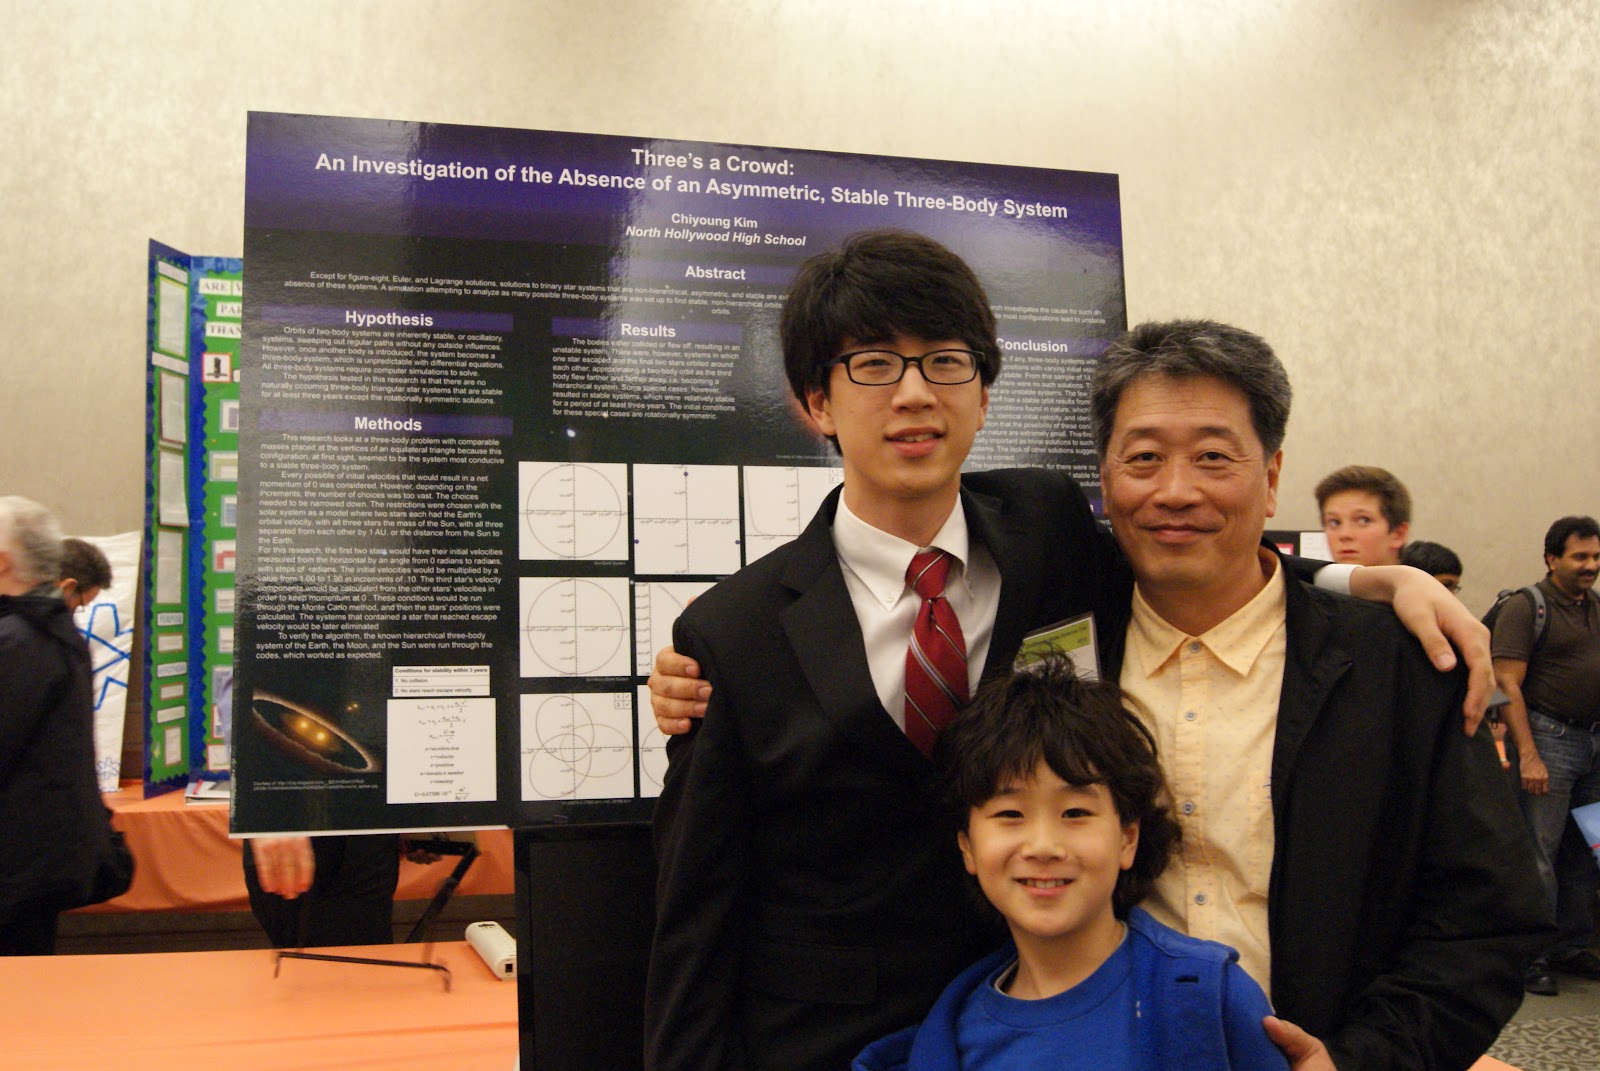
These are from the California State Science Fair. I submitted my work on the three-body problem into the Physics category. I won an Honorable Mention at the Fair.


Next up, I have pictures of me and my brother performing! We're tap dancing a choreography called "Five Guys Tap" created by our teacher Hiroshi Hamanishi.


Random Lego Hero Factory attack!

This photo is from the partial solar eclipse. I made my own camera obscura and was able to view the sun this way.

Last but not least, shoop da woop! My brother and I found chalk on the ground in the parking lot of our housing complex and drew some rage faces.

Sunday, July 8, 2012
Nostalgia Dump 1
So here's the first in a series of photo dumps I'll do for a while. I'm going to go back through my last few years of high school and take related pictures and dump them here ^____^
Look what I found! A treasure trove of pictures of Austin :)


Look what I found! A treasure trove of pictures of Austin :)


Saturday, July 7, 2012
How to make a violin
So for Science Olympiad, I made my own violin. Following are various pictures of my creation. This thing took a whole week to build during my winter break.

Shaving down the end of the tailpiece to shape it.

Cuting out the F holes with a Stanley knife

Got the inlay with a middle support bar (not found in professionally-made violins) attached

Another view, this time with the front plate.

Neck with fingerboard. I'd actually made this part before except for the fingerboard, and the whole process for that took about 20 minutes.

Side view. Not the most elegant fingerboard, but functional nevertheless.

My bow. Curves like a baroque bow with a metal "winding" to keep the bow's end from snapping off.

You can see my winding mechanism here.

Side vie. Shows the bending of the end of the bow. The little block at the end snapped off later, and I had to reglue it so it was close to the middle of the frog.

Me working on the tailpiece with a professionally-made tailpiece to compare to.

My "workshop." You can see the book I used at the bottom.

Side view. You can see the parts of the violin.

Me, again working on the tailpiece.

IT'S WOOD GRATING TIME!

Matching up the neck to the bottom plate to fix the neck block.

Side view. Austin is on the left, working on who knows what.

Mark I of the Chiyoungius series. This was scrapped because it had no sound at all and, as is visible, the wood was peeling off.

You can see in the photo above that the rounded blank had a piece chopped out of it. That piece is shown here as a F hole template. The completed tailpiece is shown at bottom. It was later relaced with stronger string as the monofilament line kept stretching and snapping due to tensile stress.

The wood front plate with the paper template. You can see the pencil markings on the front plate because I realized that the front plate was too wide to bow, as the bow would hit the sides of the front plate before it hit the strings. I gave it lots of liposuction and did the same to the bottom plate.

Aligning the side supports just in case the bent strips of wood fail.

Me gluing them in.
And voila, there you go. If I find any more pictures, I'll be sure to upload them.
Subscribe to:
Comments (Atom)